Set Excel Worksheet Margins to Wide Style Easily
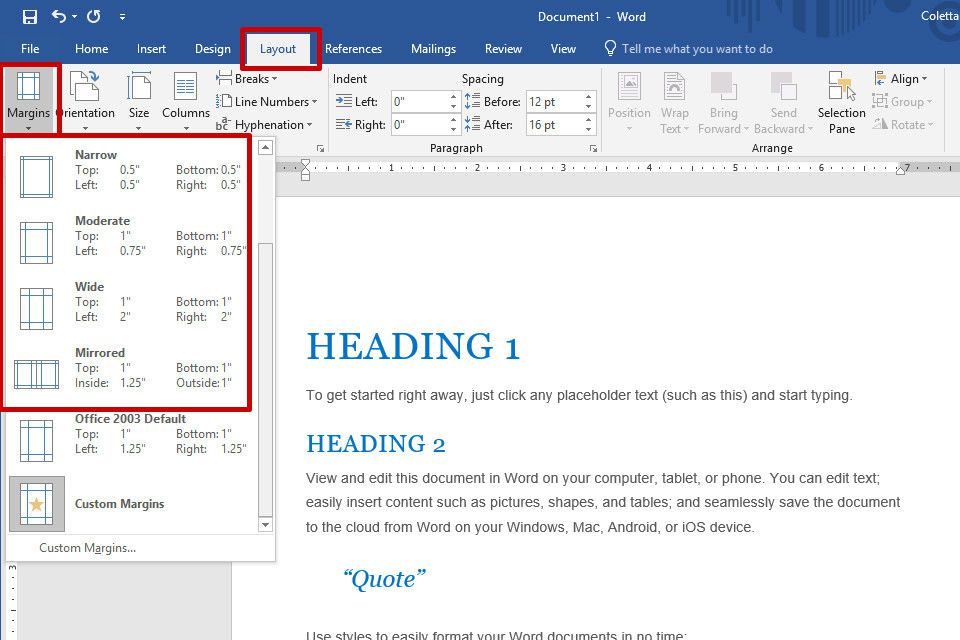
When working with Excel, setting the worksheet margins to a wide style can be beneficial for various reasons, such as enhancing readability, improving print layouts, and ensuring that important data isn’t cut off when printing or sharing. Excel provides a straightforward way to adjust worksheet margins, making it easier to customize your spreadsheet’s appearance according to your needs. Here’s a step-by-step guide on how to set Excel worksheet margins to a wide style easily.
Understanding Excel Worksheet Margins
Before adjusting the margins, it’s essential to understand what each margin represents in an Excel worksheet:
- Top Margin: The space between the top edge of the paper and the top edge of the printed area.
- Bottom Margin: The space between the bottom edge of the paper and the bottom edge of the printed area.
- Left Margin: The space between the left edge of the paper and the left edge of the printed area.
- Right Margin: The space between the right edge of the paper and the right edge of the printed area.
Setting Worksheet Margins to Wide Style
To set your Excel worksheet margins to a wide style, follow these steps:
Method 1: Adjust Margins from the Page Layout Tab
Excel’s Page Layout tab offers a quick way to adjust the margins. Here’s how:
- Open your Excel workbook and select the worksheet you want to modify.
- Click on the Page Layout tab in the ribbon.
- In the Page Setup group, click on the Margins button.
- From the drop-down list, select Custom Margins. This will open the Page Setup dialog box.
- In the Margins tab of the Page Setup dialog box, adjust the top, bottom, left, and right margins to your desired width. For a wide style, consider increasing these values.
- Click OK to apply your changes.
Method 2: Adjust Margins Directly from the Page Setup Dialog Box
For a more direct approach, you can access the Page Setup dialog box directly from the file menu:
- Go to the File tab.
- Click on Print, then select Page Setup from the options on the left side of the screen.
- Adjust the top, bottom, left, and right margins in the Margins tab of the Page Setup dialog box.
- Click OK to apply your changes.
Method 3: Using VBA Macro
For users familiar with VBA, you can also use a macro to set the margins. This method is particularly useful if you need to apply the same margin settings to multiple worksheets or workbooks.
- Press Alt + F11 to open the Visual Basic Editor.
- In the Visual Basic Editor, go to Insert > Module to insert a new module.
- In the module window, paste the following code:
Sub SetWideMargins()
    With ActiveSheet.PageSetup
       .LeftMargin = Application.InchesToPoints(1)
       .RightMargin = Application.InchesToPoints(1)
       .TopMargin = Application.InchesToPoints(1)
       .BottomMargin = Application.InchesToPoints(1)
    End With
End Sub
- Press F5 to run the macro. This will set the margins of the active worksheet to 1 inch on all sides.
🔍 Note: You can adjust the margin values in the VBA code to match your specific requirements.
Additional Tips
- Preview Your Changes: Before printing, use the Print Preview option to ensure your margin adjustments look as intended.
- Save as Default: If you frequently use wide margins, consider setting them as your default. You can do this by making the adjustments, then going to the Page Setup dialog box and clicking on Save as Default.
- Worksheet vs. Workbook: Remember that margin settings apply to individual worksheets. If you want to apply the same settings to all worksheets in a workbook, you’ll need to repeat the process for each sheet.
By following these methods, you can easily set your Excel worksheet margins to a wide style, enhancing the layout and readability of your spreadsheets.
