Translating Shapes Made Easy with Our Worksheet Guide
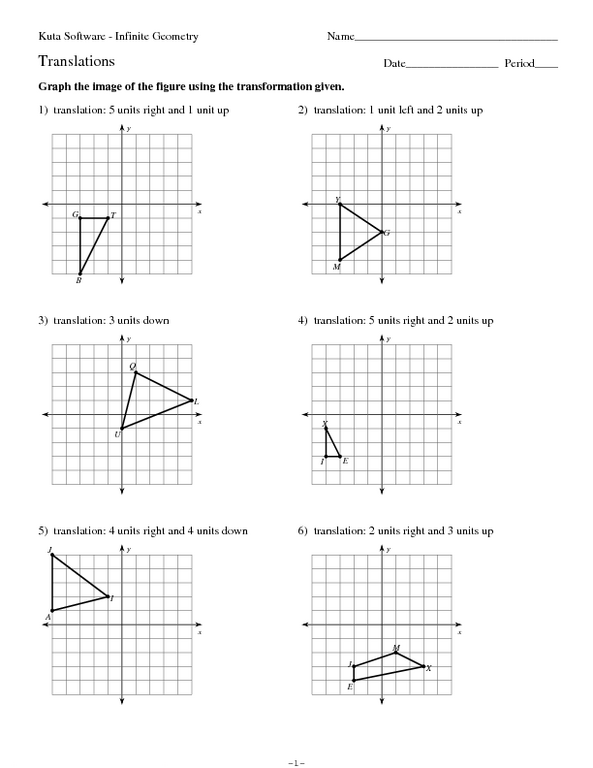
Unlocking the Secrets of Shape Translation: A Step-by-Step Guide
Are you struggling to understand the concept of shape translation? Do you find it challenging to visualize and apply this fundamental geometric transformation? Worry no more! Our worksheet guide is here to help you master shape translation with ease. In this comprehensive tutorial, we will break down the process into simple, manageable steps, and provide you with practical exercises to reinforce your understanding.
What is Shape Translation?
Before we dive into the nitty-gritty, let’s quickly review what shape translation is all about. Shape translation, also known as translation or slide, is a type of geometric transformation that involves moving a shape from one position to another without changing its size, orientation, or shape. This transformation can be represented mathematically using vectors, which specify the direction and magnitude of the translation.
Step 1: Understanding the Basics of Shape Translation
To translate a shape, you need to specify two main components: the shape itself and the translation vector. The shape can be any polygon, such as a triangle, quadrilateral, or hexagon, while the translation vector defines the direction and distance of the translation.
Translation Vector
A translation vector is a mathematical representation of the translation, consisting of two parts: the x-component and the y-component. The x-component represents the horizontal translation, while the y-component represents the vertical translation.
Example: Translating a Triangle
Suppose we want to translate a triangle 3 units to the right and 2 units up. The translation vector would be (3, 2), where the x-component is 3 and the y-component is 2.
📝 Note: The translation vector can be written in different formats, such as (x, y) or
Step 2: Applying the Translation Vector
Now that we have our translation vector, we can apply it to the shape. To do this, we need to add the x-component to the x-coordinates of the shape and add the y-component to the y-coordinates.
Example: Translating a Triangle (continued)
Using the same triangle from before, we add 3 to the x-coordinates and 2 to the y-coordinates:
Original coordinates: (0, 0), (2, 0), (1, 2) Translated coordinates: (3, 2), (5, 2), (4, 4)
As you can see, the triangle has been translated 3 units to the right and 2 units up.
Step 3: Visualizing the Translation
It’s essential to visualize the translation to understand how the shape changes. You can use graph paper or a coordinate grid to help you visualize the translation.
Example: Visualizing the Translation
Using graph paper, draw the original triangle and the translated triangle. Connect the corresponding vertices to see how the shape has changed.

| Original Triangle | Translated Triangle |
|---|---|
| (0, 0) | (3, 2) |
| (2, 0) | (5, 2) |
| (1, 2) | (4, 4) |
Step 4: Practicing Shape Translation
Now that you understand the basics of shape translation, it’s time to practice! Our worksheet guide provides you with a variety of exercises to help you master this skill.
Exercise 1: Translating a Quadrilateral
Translate the quadrilateral 2 units to the left and 1 unit down.
Original coordinates: (1, 1), (3, 1), (3, 3), (1, 3) Translated coordinates: _______________________
Exercise 2: Translating a Hexagon
Translate the hexagon 1 unit to the right and 2 units up.
Original coordinates: (0, 0), (2, 0), (3, 1), (2, 2), (0, 2), (1, 1) Translated coordinates: _______________________
📝 Note: Remember to add the x-component to the x-coordinates and the y-component to the y-coordinates.
As you work through these exercises, you’ll become more confident in your ability to translate shapes.
Step 5: Real-World Applications of Shape Translation
Shape translation has numerous real-world applications, from architecture to engineering. By mastering this skill, you’ll be able to tackle complex problems and visualize solutions more effectively.
Example: Architecture
Suppose you’re designing a building, and you want to move a window 2 units to the right and 1 unit up. You can use shape translation to determine the new coordinates of the window.
Example: Engineering
Imagine you’re designing a robot arm, and you need to move the end effector 3 units to the left and 2 units down. You can use shape translation to calculate the new position of the end effector.
By applying shape translation to real-world problems, you’ll be able to develop innovative solutions and enhance your critical thinking skills.
In conclusion, shape translation is a fundamental concept in geometry that has numerous real-world applications. By following these steps and practicing with our worksheet guide, you’ll be able to master this skill and tackle complex problems with confidence. Remember to visualize the translation, practice regularly, and apply shape translation to real-world problems to become a geometry expert.
What is shape translation?
+Shape translation is a type of geometric transformation that involves moving a shape from one position to another without changing its size, orientation, or shape.
How do I apply the translation vector?
+To apply the translation vector, add the x-component to the x-coordinates and the y-component to the y-coordinates of the shape.
What are some real-world applications of shape translation?
+Shape translation has numerous real-world applications, including architecture, engineering, and design.
Related Terms:
- Translation practice worksheet pdf
- 2D Shape Translations
- Translation Worksheet
- Reflection worksheet
- Rotation worksheet
- Worksheet transformations geometry
