Free Body Diagrams Worksheet for Physics Students
Understanding Free Body Diagrams: A Comprehensive Guide for Physics Students
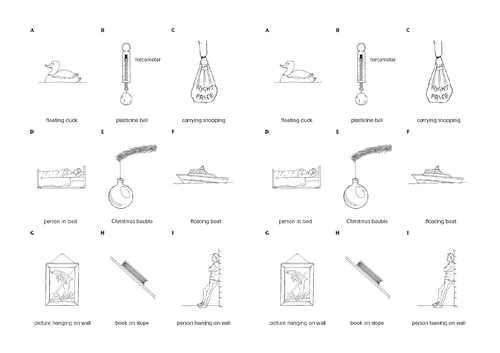
Free body diagrams (FBDs) are a fundamental tool in physics, used to visualize and analyze the forces acting on an object. As a physics student, it’s essential to master the art of creating and interpreting FBDs to solve problems involving motion, forces, and energy. In this worksheet, we’ll explore the concept of free body diagrams, their importance, and provide exercises to help you practice and reinforce your understanding.
What is a Free Body Diagram?
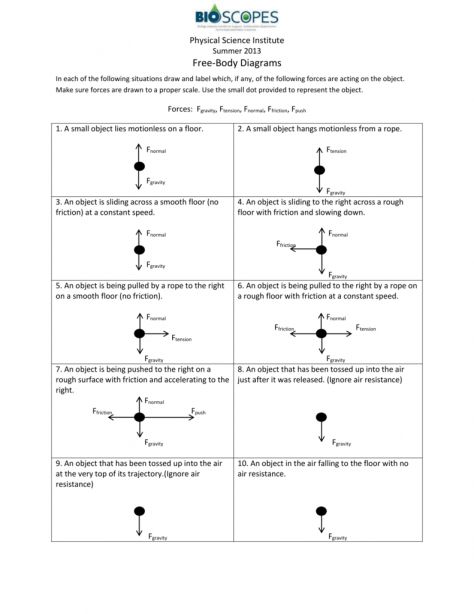
A free body diagram is a graphical representation of an object, isolated from its surroundings, showing all the forces acting on it. FBDs help you identify the forces, their directions, and magnitudes, making it easier to apply Newton’s laws of motion and solve problems.
Why are Free Body Diagrams Important?
Free body diagrams are crucial in physics because they:
- Help you identify and visualize the forces acting on an object
- Enable you to apply Newton’s laws of motion and solve problems
- Allow you to analyze complex systems and simplify them
- Facilitate the calculation of net forces, accelerations, and energies
How to Draw a Free Body Diagram
Drawing a free body diagram involves the following steps:
- Identify the object: Choose the object you want to analyze and isolate it from its surroundings.
- Determine the forces: Identify all the forces acting on the object, including gravitational, normal, frictional, and applied forces.
- Represent the forces: Draw a vector to represent each force, indicating its direction and magnitude.
- Label the forces: Label each force with its symbol and magnitude (if known).
Example: Drawing a Free Body Diagram
Consider a block of mass 2 kg placed on a horizontal surface. The block is pulled by a force of 5 N towards the right. Draw the free body diagram.
| Force | Direction | Magnitude |
|---|---|---|
| Weight (W) | Down | 2 kg × 9.8 m/s² = 19.6 N |
| Normal Force (N) | Up | Unknown |
| Applied Force (F) | Right | 5 N |
| Frictional Force (f) | Left | Unknown |
The free body diagram would look like this:
Note that the frictional force is unknown, and its magnitude and direction will depend on the surface roughness and other factors.
Exercises: Practice Drawing Free Body Diagrams
Exercise 1: A 3 kg box is pushed up a frictionless incline by a force of 10 N. Draw the free body diagram.
Exercise 2: A 2 kg book is placed on a rough surface. A force of 5 N is applied horizontally to the book. Draw the free body diagram.
Exercise 3: A 1 kg ball is thrown upwards with an initial velocity of 20 m/s. Draw the free body diagram at the highest point of the ball’s trajectory.
Solving Problems using Free Body Diagrams
Once you have drawn the free body diagram, you can use it to solve problems involving motion, forces, and energy. Here are some examples:
- Finding net force: Calculate the net force acting on an object by adding the forces in the same direction and subtracting the forces in opposite directions.
- Calculating acceleration: Use Newton’s second law (F = ma) to calculate the acceleration of an object.
- Determining energy: Use the work-energy theorem (W = ΔE) to calculate the change in energy of an object.
Common Mistakes to Avoid
When drawing free body diagrams, avoid the following common mistakes:
- Omitting forces: Make sure to include all the forces acting on the object, including frictional and normal forces.
- Incorrect force directions: Ensure that the force directions are correct and consistent with the problem statement.
- Scaling issues: Be careful with the scaling of your diagram, as incorrect scaling can lead to errors in calculations.
📝 Note: Practice drawing free body diagrams regularly to become proficient in identifying and visualizing forces.
Conclusion
Free body diagrams are a powerful tool in physics, allowing you to visualize and analyze the forces acting on an object. By mastering the art of drawing and interpreting FBDs, you’ll become proficient in solving problems involving motion, forces, and energy. Remember to practice regularly and avoid common mistakes to improve your skills.
What is the purpose of a free body diagram?
+A free body diagram is used to visualize and analyze the forces acting on an object, helping you identify the forces, their directions, and magnitudes.
How do I draw a free body diagram?
+Draw a free body diagram by identifying the object, determining the forces acting on it, representing the forces with vectors, and labeling them with their symbols and magnitudes.
What are some common mistakes to avoid when drawing free body diagrams?
+Avoid omitting forces, incorrect force directions, and scaling issues when drawing free body diagrams.
Related Terms:
- Free body diagrams Worksheet answer KEY
- Free body diagrams Worksheet PDF
- Free body diagram maker
- Force Diagrams Worksheet with answers
