10 Colored Pencil Techniques to Master
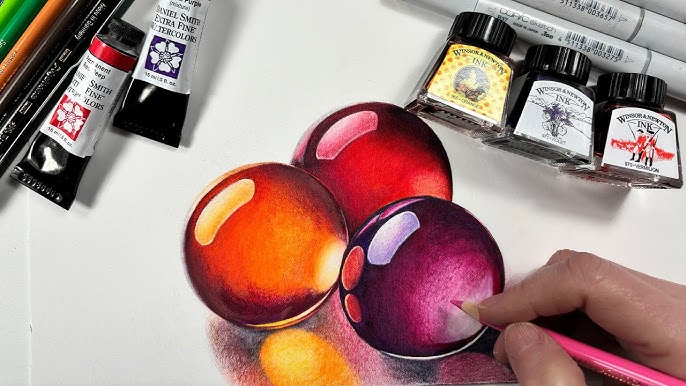
Unlocking the World of Colored Pencils: 10 Techniques to Master
Colored pencils are a versatile and expressive medium that can be used to create a wide range of artistic effects. From soft, delicate shading to bold, vibrant color statements, colored pencils offer a unique combination of precision and expressiveness. Whether you’re a seasoned artist or just starting out, mastering various colored pencil techniques can help you unlock the full potential of this medium.
1. Hatching and Cross-Hatching
Hatching and cross-hatching are fundamental techniques in colored pencil art. Hatching involves creating a series of closely spaced parallel lines to build up shading and texture. Cross-hatching involves layering hatching lines at different angles to create deeper, more dimensional shading.
- Tips:
- Use a sharp pencil to create fine, detailed lines.
- Experiment with different line weights and angles to achieve varying textures and effects.
- Build up layers gradually to avoid muddying the colors.
2. Stippling
Stippling involves creating an image using small dots of color. This technique can be time-consuming, but it allows for incredible detail and precision.
- Tips:
- Use a sharp pencil to create small, even dots.
- Experiment with different dot patterns and spacings to achieve varying textures and effects.
- Use a range of colors to build up depth and dimension.
3. Blending
Blending involves merging two or more colors together to create a smooth, seamless transition. This technique is essential for creating realistic, nuanced color gradations.
- Tips:
- Use a blending stump or tortillon to gently merge colors.
- Experiment with different blending techniques, such as layering or glazing.
- Use a range of colors to build up depth and dimension.
4. Glazing
Glazing involves applying multiple layers of transparent color to achieve a deep, rich effect. This technique is ideal for creating luminous, jewel-toned colors.
- Tips:
- Use a sharp pencil to create fine, detailed layers.
- Experiment with different layering techniques, such as building up gradually or using bold, expressive strokes.
- Use a range of colors to build up depth and dimension.
5. Burnishing
Burnishing involves applying heavy pressure to the pencil to create a smooth, waxy texture. This technique is ideal for creating rich, vibrant colors and subtle, nuanced shading.
- Tips:
- Use a sharp pencil to create fine, detailed strokes.
- Experiment with different pressure levels to achieve varying textures and effects.
- Use a range of colors to build up depth and dimension.
6. Scraping
Scraping involves using a sharp tool, such as a craft knife or scraper, to remove pigment and create fine, detailed textures.
- Tips:
- Use a sharp tool to create fine, detailed scratches.
- Experiment with different scraping techniques, such as hatching or cross-hatching.
- Use a range of colors to build up depth and dimension.
7. Masking
Masking involves applying a masking fluid or tape to protect areas of the paper from color. This technique is ideal for creating crisp, sharp edges and subtle, nuanced shading.
- Tips:
- Use a sharp pencil to create fine, detailed lines.
- Experiment with different masking techniques, such as layering or glazing.
- Use a range of colors to build up depth and dimension.
8. Lift-Off
Lift-off involves using a kneaded eraser or other lifting tool to remove pigment and create subtle, nuanced highlights.
- Tips:
- Use a sharp eraser to create fine, detailed lifts.
- Experiment with different lifting techniques, such as hatching or cross-hatching.
- Use a range of colors to build up depth and dimension.
9. Wash
Wash involves applying a thin layer of color to the paper to create a soft, subtle effect. This technique is ideal for creating delicate, ethereal backgrounds.
- Tips:
- Use a sharp pencil to create fine, detailed strokes.
- Experiment with different wash techniques, such as layering or glazing.
- Use a range of colors to build up depth and dimension.
10. Sgraffito
Sgraffito involves applying a layer of color to the paper and then scratching through it to create fine, detailed textures.
- Tips:
- Use a sharp tool to create fine, detailed scratches.
- Experiment with different scratching techniques, such as hatching or cross-hatching.
- Use a range of colors to build up depth and dimension.
🎨 Note: Experimenting with different techniques and layering styles can help you achieve unique and interesting effects. Don't be afraid to try new things and make mistakes – they can often lead to unexpected and exciting results!
In conclusion, mastering various colored pencil techniques can help you unlock the full potential of this medium and create stunning, expressive artworks. Whether you’re a seasoned artist or just starting out, remember to experiment, take risks, and have fun!
What are the basic colored pencil techniques?
+The basic colored pencil techniques include hatching, cross-hatching, stippling, blending, and burnishing. These techniques can be used to create a wide range of artistic effects, from soft, delicate shading to bold, vibrant color statements.
How do I achieve smooth, seamless color gradations?
+To achieve smooth, seamless color gradations, use a blending stump or tortillon to gently merge colors. Experiment with different blending techniques, such as layering or glazing, and use a range of colors to build up depth and dimension.
What is the best way to remove pigment and create fine, detailed textures?
+The best way to remove pigment and create fine, detailed textures is to use a sharp tool, such as a craft knife or scraper, or a kneaded eraser. Experiment with different scraping and lifting techniques to achieve varying textures and effects.
Related Terms:
- Colored pencil techniques worksheet free
- Colored pencil blending worksheet
