Center Excel Worksheet Horizontally Made Easy

How to Center Excel Worksheet Horizontally: A Step-by-Step Guide
When working with Excel, you may want to center your worksheet horizontally to make it more visually appealing or to prepare it for printing. Fortunately, Excel provides a few ways to achieve this, and in this article, we’ll explore the easiest methods to center your Excel worksheet horizontally.
Method 1: Using the Page Layout Tab
One of the simplest ways to center an Excel worksheet horizontally is by using the Page Layout tab. Here’s how:
- Click on the "Page Layout" tab in the ribbon.
- In the "Page Setup" group, click on the "Print Titles" button.
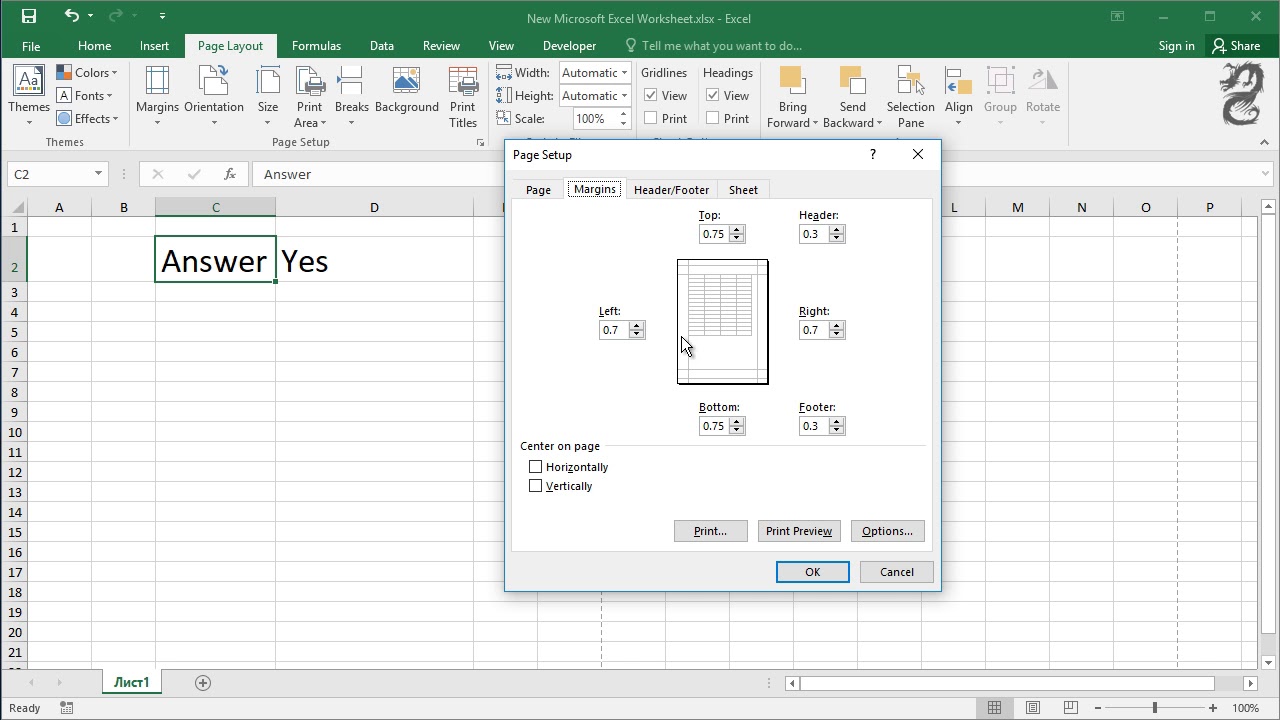
- In the "Print Titles" dialog box, check the box next to "Center horizontally" under the "Sheet" tab.
- Click "OK" to apply the changes.
Method 2: Using the Print Preview
Another way to center your Excel worksheet horizontally is by using the Print Preview feature. Here’s how:
- Click on the "File" tab in the ribbon.
- Click on "Print" and then select "Print Preview" from the drop-down menu.
- In the Print Preview window, click on the "Page Setup" button.
- In the "Page Setup" dialog box, check the box next to "Center horizontally" under the "Sheet" tab.
- Click "OK" to apply the changes.
Method 3: Using VBA Macro
If you want to center your Excel worksheet horizontally programmatically, you can use a VBA macro. Here’s an example code snippet that does this:
Sub CenterWorksheetHorizontally()
    With ActiveSheet.PageSetup
       .CenterHorizontally = True
    End With
End Sub
To use this code, follow these steps:
- Press "Alt + F11" to open the VBA Editor.
- In the VBA Editor, insert a new module by clicking "Insert" > "Module" from the menu.
- Paste the code into the module window.
- Close the VBA Editor and return to your Excel worksheet.
- Press "Alt + F8" to open the Macro dialog box.
- Select the "CenterWorksheetHorizontally" macro and click "Run" to execute it.
💡 Note: Make sure to enable macros in your Excel settings before running this code.
Tips and Variations
- To center your Excel worksheet vertically, you can use the same methods as above, but select the “Center vertically” option instead.
- To center a specific range of cells horizontally, you can use the
Range.HorizontalAlignmentproperty in VBA. For example:
Sub CenterRangeHorizontally()
    Range("A1:E10").HorizontalAlignment = xlCenter
End Sub
- To center an entire worksheet horizontally and vertically, you can use the following VBA code:
Sub CenterWorksheetBoth()
    With ActiveSheet.PageSetup
       .CenterHorizontally = True
       .CenterVertically = True
    End With
End Sub
Conclusion
Centering an Excel worksheet horizontally is a straightforward process that can be achieved using various methods. Whether you prefer to use the Page Layout tab, Print Preview, or VBA macros, this article has provided you with the necessary steps to get the job done. By following these methods, you can create visually appealing and balanced worksheets that are perfect for printing or sharing with others.
How do I center a range of cells horizontally in Excel?
+You can center a range of cells horizontally by using the Range.HorizontalAlignment property in VBA. For example: Range("A1:E10").HorizontalAlignment = xlCenter.
Can I center an entire worksheet horizontally and vertically using VBA?
+Yes, you can center an entire worksheet horizontally and vertically using VBA. Use the following code: With ActiveSheet.PageSetup.CenterHorizontally = True.CenterVertically = True End With.
How do I enable macros in Excel?
+To enable macros in Excel, go to “File” > “Options” > “Trust Center” > “Trust Center Settings” > “Macro Settings” and select “Enable all macros” or “Disable all macros except digitally signed macros” depending on your preference.


