5 Steps to Master Force Diagrams

Understanding the Fundamentals of Force Diagrams
Force diagrams are a crucial tool in physics and engineering, used to visualize and analyze the forces acting on an object. Mastering force diagrams is essential for solving problems related to motion, forces, and equilibrium. In this article, we will break down the process of creating and interpreting force diagrams into five manageable steps.
Step 1: Identify the Object and the Forces Acting on It
The first step in creating a force diagram is to identify the object being analyzed and the forces acting on it. This involves determining the type of forces present, such as:
- Gravity: the force of gravity acting on the object, which is always directed downwards.
- Normal force: the force exerted by a surface on the object, which is perpendicular to the surface.
- Friction: the force that opposes motion between two surfaces in contact.
- Tension: the force exerted by a string or wire on the object.
- Applied forces: any external forces applied to the object, such as a push or a pull.
Step 2: Determine the Direction of Each Force
Once the forces have been identified, the next step is to determine the direction of each force. This involves using arrows to represent the direction of each force. The direction of the force should be indicated by the direction of the arrow, with the arrowhead pointing in the direction of the force.
📝 Note: It is essential to use a consistent convention for representing forces, such as using arrows to indicate the direction of each force.
Step 3: Draw the Force Diagram
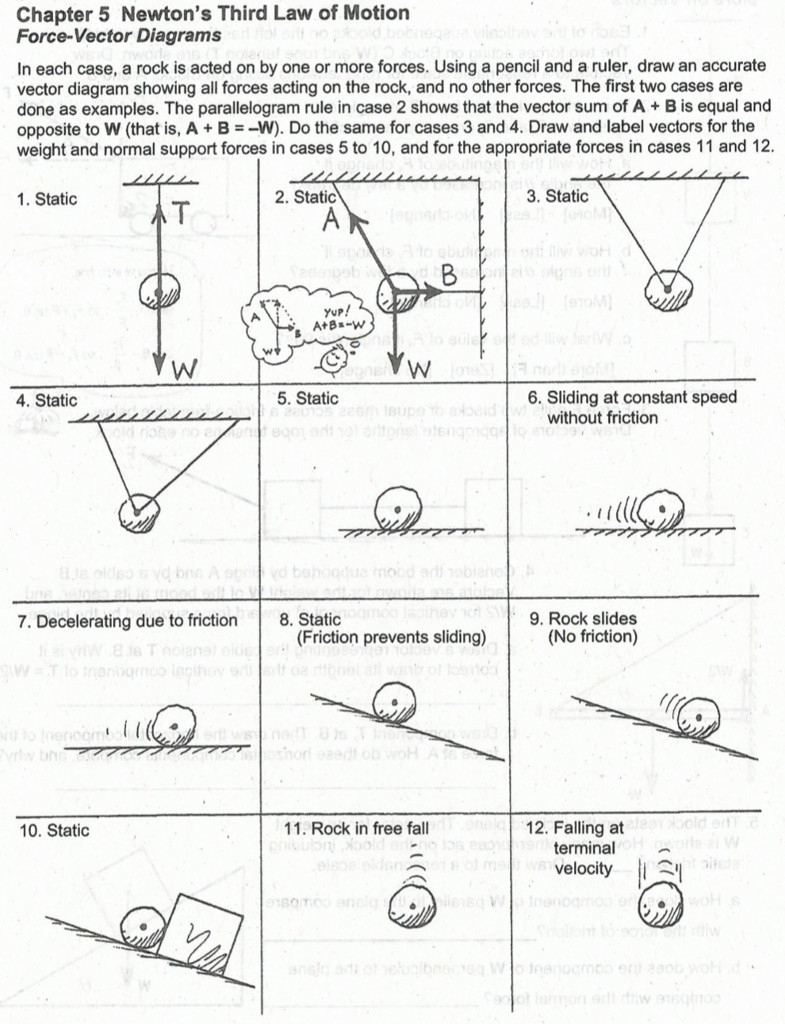
With the forces and their directions identified, the next step is to draw the force diagram. This involves drawing a vector diagram, where each force is represented by an arrow. The length of the arrow should be proportional to the magnitude of the force.
- Tips for drawing force diagrams:
- Use a ruler to ensure that the diagram is accurate and symmetrical.
- Use different colors or line styles to distinguish between different forces.
- Label each force with its corresponding symbol or abbreviation.

| Force | Symbol | Description |
|---|---|---|
| Gravity | mg | Force of gravity acting on the object |
| Normal force | N | Force exerted by a surface on the object |
| Friction | f | Force opposing motion between two surfaces in contact |
Step 4: Analyze the Force Diagram
Once the force diagram has been drawn, the next step is to analyze it. This involves using the diagram to identify the net force acting on the object, as well as the direction of the net force.
- Tips for analyzing force diagrams:
- Look for any symmetries or patterns in the diagram.
- Use the diagram to identify any forces that are balanced or cancelled out.
- Use the diagram to determine the net force acting on the object.
Step 5: Solve the Problem Using the Force Diagram
The final step is to use the force diagram to solve the problem. This involves using the net force and direction of the net force to calculate the motion or equilibrium of the object.
- Tips for solving problems using force diagrams:
- Use the net force to calculate the acceleration of the object.
- Use the net force to determine the equilibrium position of the object.
- Use the diagram to identify any potential errors or misconceptions.
In conclusion, mastering force diagrams requires a systematic approach that involves identifying the forces acting on an object, determining the direction of each force, drawing the force diagram, analyzing the force diagram, and solving the problem using the force diagram. By following these steps and practicing with different types of problems, you can become proficient in using force diagrams to solve problems related to motion, forces, and equilibrium.
What is the purpose of a force diagram?
+A force diagram is a tool used to visualize and analyze the forces acting on an object. It helps to identify the net force and direction of the net force, which can be used to calculate the motion or equilibrium of the object.
How do I determine the direction of each force?
+The direction of each force should be indicated by the direction of the arrow, with the arrowhead pointing in the direction of the force. Use a consistent convention for representing forces, such as using arrows to indicate the direction of each force.
What is the net force?
+The net force is the sum of all the forces acting on an object. It is the force that determines the motion or equilibrium of the object.
Related Terms:
- Worksheet 2 Drawing force diagrams
- Force Diagrams Worksheet PDF
- Drawing free-body diagrams Worksheet answers


